Looking to add a touch of handmade charm to your winter wardrobe? Crocheting a beanie is a fun and rewarding way to stay warm and stylish all season long. Whether you’re a seasoned crafter or new to the world of crochet, this step-by-step guide will have you whipping up cozy beanies in no time. Grab your crochet hook and let’s get stitching!
Choosing the Right Yarn and Crochet Hook
When it comes to crocheting a beanie, are essential steps to ensure the final product turns out just the way you want it. Here are some tips to help you make the best choices:
Yarn:
- Consider the weight: Choose a yarn weight that is appropriate for the beanie you want to create. Bulky yarns work well for thick, warm beanies, while lighter weight yarns are more suitable for delicate designs.
- Texture matters: The texture of the yarn can also affect the look and feel of your beanie. Smooth yarns will give you a clean, polished finish, while textured yarns can add dimension and interest to your project.
- Color choice: Select a color or colors that fit your personal style or the recipient’s taste. Bold, bright colors can make a statement, while neutral tones offer a timeless, classic look.
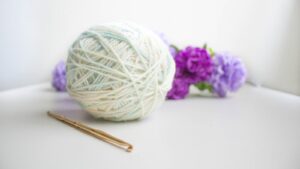
Crochet Hook:
- Size matters: The size of your crochet hook will affect the size and texture of your stitches. Be sure to choose a hook size that is recommended for the yarn you’ve selected.
- Comfort is key: Look for a crochet hook that feels comfortable in your hand, especially if you’ll be working on a larger project like a beanie. Ergonomic hooks can help prevent hand fatigue and make crocheting more enjoyable.
- Material: Crochet hooks come in a variety of materials, including aluminum, plastic, and bamboo. Experiment with different types to see which one works best for you and your crocheting style.
Understanding Basic Crochet Stitches for Beanie Making
When it comes to making beanies, understanding basic crochet stitches is essential. By mastering a few key techniques, you’ll be able to create cozy and stylish hats that will keep you warm all winter long.
One of the most common stitches used in beanie making is the single crochet. This stitch creates a tight and sturdy fabric, perfect for keeping out the cold. To work a single crochet, insert your hook into the stitch, yarn over, pull up a loop, yarn over again, and then pull through both loops on the hook.
Another important stitch for beanies is the double crochet. This stitch is taller than the single crochet, creating a looser and more flexible fabric. To work a double crochet, yarn over, insert your hook into the stitch, yarn over again, pull up a loop, yarn over once more, pull through two loops, and then yarn over and pull through the remaining two loops.
Creating the Perfect Fit: Sizing and Measurements
When it comes to crocheting a beanie, getting the perfect fit is essential. Sizing and measurements play a key role in ensuring that your beanie turns out just right. Here are some tips and tricks to help you achieve the perfect fit for your crochet beanie:
1. Measure your head: Before you start crocheting, it’s important to measure your head to determine the correct size for your beanie. Use a tape measure to measure the circumference of your head just above your ears, where the brim of the beanie will sit.
2. Choose the right yarn weight: The weight of the yarn you choose will impact the size and fit of your beanie. Be sure to select a yarn weight that aligns with the sizing measurements you have taken. Lighter weight yarn will create a smaller beanie, while heavier weight yarn will result in a larger beanie.
3. Adjust your stitches: If you find that your beanie is turning out too big or too small, you can easily adjust the size by adding or subtracting stitches. Experiment with different stitch counts to achieve the perfect fit for your head.
Adding Unique Design Elements to Your Crocheted Beanie
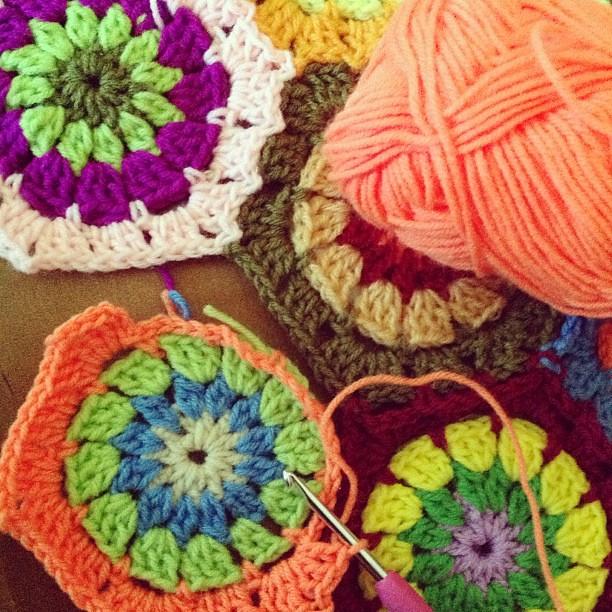
When it comes to crocheting beanies, adding unique design elements can take your project to the next level. One fun way to spruce up your beanie is by incorporating different textures. Consider using a combination of standard crochet stitches like single crochet, double crochet, and popcorn stitches to create a visually interesting piece.
Another way to add flair to your crocheted beanie is by incorporating colorwork. Experiment with using multiple colors in stripes, color blocking, or even creating fun patterns like polka dots or chevrons. This is a great opportunity to use up any leftover yarn you have in your stash or to add a pop of color to your wardrobe.
Don’t forget about embellishments! Adding buttons, pom poms, flowers, or other decorative elements can really make your beanie stand out. Consider attaching a faux fur pom pom to the top, sewing on some cute buttons along the brim, or crocheting a small flower to adorn the side. The possibilities are endless when it comes to customizing your crocheted beanie.
Finishing Touches: Sewing and Securing Your Beanie
After completing the main body of your beanie, it’s time to add those finishing touches to make it look neat and polished. Start by sewing in any loose yarn ends to secure them and prevent any unraveling. Use a tapestry needle to weave the yarn through the stitches on the inside of the beanie, being careful not to distort the shape.
Next, you’ll want to make sure your beanie fits securely on your head. To do this, **crochet** a row of slip stitches around the bottom edge of the beanie. This will help to reinforce the edge and provide a snug fit. You can also add a ribbed band or pom pom for a stylish touch.
Finally, don’t forget to give your beanie a final steam blocking to smooth out any bumps or wrinkles. Gently steam the beanie with an iron or a steamer, being careful not to get too close to the yarn to avoid damaging it. Let the beanie dry completely before wearing it to show off your handiwork!
In Retrospect
As you finish your final row and weave in the last ends, admire the cozy beanie you’ve created with your own two hands. Whether you’re a seasoned crocheter or a beginner, there’s something truly magical about taking a simple ball of yarn and turning it into a stylish accessory. Embrace the satisfaction of a completed project and wear your beanie with pride. And remember, the possibilities are endless when you have a hook, yarn, and a little bit of creativity. Happy crocheting!