Whether you’re a seasoned crocheter or a complete beginner, learning how to make a slip knot is an essential skill for any project. This simple yet versatile knot serves as the foundation for countless crochet patterns, allowing you to start your project with confidence and ease. In this article, we will guide you through the step-by-step process of creating a slip knot crochet, so you can unleash your creativity and bring your crochet vision to life.
Introduction to Slip Knot Crochet
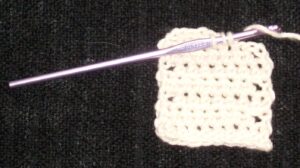
Slip knot crochet is a technique that allows you to easily start your crochet projects without any hassle. It is a foundational skill that every crocheter should master before diving into more complex patterns. In slip knot crochet, you create a loop that tightens when you pull on the working yarn, creating a secure and adjustable starting point for your work. This technique is essential for making amigurumi, blankets, and other crochet projects.
One of the key benefits of slip knot crochet is its versatility. Once you have mastered the basic technique, you can use it to create a wide variety of stitches and textures in your crochet projects. From simple chains to intricate lace patterns, slip knot crochet can be adapted to suit any style or skill level. Whether you are a beginner or an experienced crocheter, this technique is sure to become a valuable tool in your crafting arsenal.
Ready to give slip knot crochet a try? Follow these simple steps to create your first slip knot:
- Gather your crochet hook and yarn.
- Loop the yarn around your fingers to create a circle.
- Insert your crochet hook through the circle and pull the working yarn to tighten the loop.
Basic Tools and Materials Needed
Before diving into the world of crocheting, there are a few basic tools and materials you’ll need to have on hand. These items are essential for creating a slip knot crochet, a fundamental step in starting any crochet project. Here’s a rundown of what you’ll need:
- Crochet hook: Choose a hook size that matches the specifications of the yarn you’ll be using for your project.
- Yarn: Select a yarn that complements your chosen crochet hook. Make sure you have enough yarn to complete your project.
- Scissors: A good pair of scissors will come in handy for cutting your yarn as needed.
- Tape measure: Keep a tape measure nearby to ensure your crochet project is the right size.
Once you’ve gathered all the necessary tools and materials, it’s time to start creating your slip knot crochet. Follow these steps to master the technique:
- Hold the crochet hook in your dominant hand and wrap the yarn around your fingers to create a loop.
- Insert the hook through the loop and pull the yarn to tighten the knot around the hook.
- Adjust the size of the loop as needed by tugging on the yarn tails.
Practicing the slip knot crochet may take some time, but with patience and persistence, you’ll soon become a pro at this foundational crochet technique. Remember to keep your tools and materials organized and within reach to make the process smoother and more enjoyable. Now, grab your supplies and get ready to create something beautiful!
Step-by-Step Guide to Creating a Slip Knot
Starting with a slip knot is the first step in many crochet projects. Follow these simple instructions to create a slip knot for your next crochet masterpiece.
Materials Needed:
- Yarn
- Crochet hook
Instructions:
- Step 1: Create a loop with the yarn, leaving a tail.
- Step 2: Insert your crochet hook through the loop.
- Step 3: Grab the working yarn and pull it through the loop on your hook.
Tips for Tightening and Adjusting Your Slip Knot
When it comes to crochet, mastering the slip knot is essential for getting started on any project. Follow these tips to ensure your slip knot is secure and adjustable:
Loosen up: Before tightening your slip knot, make sure to leave a little bit of slack in the loop. This will make it easier to adjust the size of the loop later on.
Test the tension: Once you have tightened your slip knot, gently pull on the yarn to see if the loop can be easily adjusted. If it feels too tight, simply pull on the tail end to loosen it up.
Practice makes perfect: Don’t get discouraged if your slip knot doesn’t come out perfectly the first time. Keep practicing and experimenting with different tensions until you find what works best for you.
Common Mistakes to Avoid When Making a Slip Knot
When making a slip knot in crochet, there are a few common mistakes that beginners often make. By avoiding these errors, you can ensure that your slip knot is neat, secure, and easy to work with. Here are some key points to keep in mind:
Avoid making the slip knot too tight: One of the most common mistakes beginners make is pulling the working yarn too tightly when creating the slip knot. This can make it difficult to work with the loop and can result in uneven tension in your crochet project. To prevent this, make sure to leave a bit of slack in the loop before tightening it.
Make sure the slip knot is facing the correct direction: Another mistake to watch out for is creating the slip knot with the tail end of the yarn facing the wrong way. This can affect the way that your stitches look and may cause your project to unravel. Double check to ensure that the slip knot is facing the correct direction before moving on to the next step.
Key Takeaways
As you practice and perfect your slip knot crochet technique, you’ll unlock a world of creative possibilities. Whether you’re a seasoned crocheter or a beginner just starting out, mastering this foundational stitch is the key to creating beautiful and intricate designs. So grab your yarn and hook, and get ready to make magic with the versatile slip knot crochet. Happy crocheting!