Crocheting a granny square is like painting a colorful patchwork masterpiece with yarn and a hook. The charm of this classic crochet pattern lies in its simplicity and versatility, making it a favorite among beginners and experienced crafters alike. Whether you’re looking to create a cozy blanket, a cute pillow cover, or a trendy sweater, the granny square is a timeless and fun technique to master. In this article, we’ll break down the steps and share tips to help you effortlessly crochet your own beautiful granny squares.
The Basics of Crocheting a Granny Square
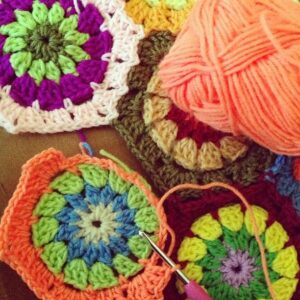
Granny squares are a classic and versatile crochet pattern that can be used to create a variety of projects such as blankets, scarves, and even clothing. Learning how to crochet a granny square is a fantastic way for beginners to practice their crochet skills and create something beautiful at the same time.
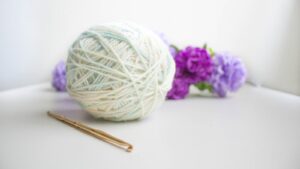
To start crocheting a granny square, you will need yarn in your desired color and weight, a crochet hook that matches the recommended size for your yarn, and a pair of scissors. Once you have your materials ready, follow these simple steps:
- Make a slip knot: Start by making a slip knot on your crochet hook.
- Chain 4: Chain 4 stitches to create a loop.
- Double crochet: Work 3 double crochet stitches into the center of the loop, then chain 2.
Choosing the Right Yarn and Hook Size
When it comes to crocheting a granny square, one of the most important aspects to consider is . The yarn you choose will determine the overall look and feel of your project, while the hook size will affect the size and texture of the stitches. Here are some tips to help you select the perfect yarn and hook size for your granny square:
Yarn:
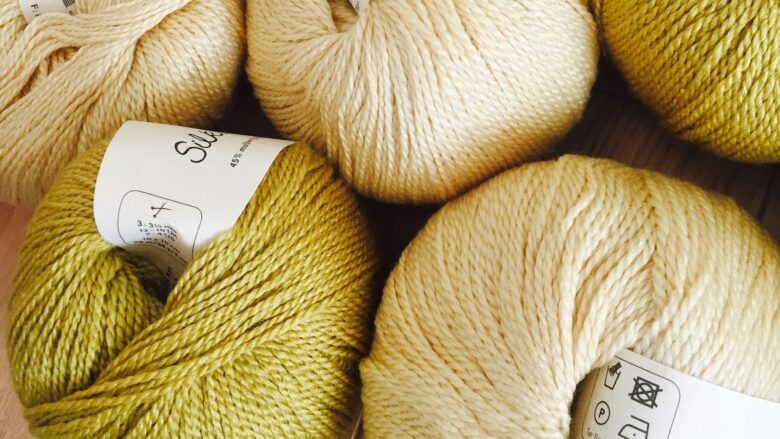
- Choose a yarn that is the right weight for your project. Thicker yarns will result in larger, chunkier squares, while thinner yarns will create more delicate squares.
- Consider the texture of the yarn. Smooth, tightly spun yarns are ideal for showing off intricate stitch patterns, while fluffy or textured yarns can add a unique touch to your squares.
- Think about the color scheme you want to achieve. Solid or variegated yarns can create different effects in your granny squares, so choose a yarn that fits your vision.
Hook Size:
- Match the hook size to the yarn weight. Most yarn labels will recommend a specific hook size range, so be sure to follow these guidelines for best results.
- Consider the type of stitches you will be using. If you want tight, dense squares, use a smaller hook size. For looser, more open squares, go up a hook size or two.
- Don’t be afraid to experiment! Crochet is a versatile craft, so feel free to try different hook sizes with the same yarn to see what effect you prefer.
Step-by-Step Guide to Creating the Perfect Granny Square
First, gather your materials which include yarn of your choice, a crochet hook, and scissors. Choose colors that complement each other for a visually appealing granny square.
Begin by creating a slip knot and chaining 4. Then, join the chain to make a ring by slip stitching into the first chain. This forms the center of your granny square.
- Row 1: Chain 3 (counts as first double crochet), work 2 double crochets into the ring, chain 2, then work 3 double crochets into the ring. Repeat 2 more times to create 4 sets of 3 double crochets with chain 2 corners.
- Row 2: Chain 3, work 2 double crochets into the same space, *work 3 double crochets in the next corner space, chain 2, work 3 more double crochets in the same corner space*. Repeat *-* around, then join with a slip stitch to the top of the beginning chain 3.
Continue working rounds in this manner, increasing the number of double crochets in each side and chaining 2 at corners until your granny square reaches the desired size. Fasten off and weave in ends to finish.
Tips and Tricks for Perfecting Your Technique
When crocheting a granny square, it’s important to start with a magic ring to create a tight center that won’t leave any gaps. To do this, hold the end of the yarn in your hand and wrap it around your fingers to create a loop. Insert your hook into the loop, yarn over, and pull up a loop. Then, chain 1 to secure the ring. This will give you a solid foundation to build your granny square.
As you work your way around the magic ring, remember to always start each new round in a corner space to maintain the square shape. This will help you keep your stitches even and prevent the square from becoming lopsided. To create the classic granny square pattern, work 3 double crochet stitches into each corner space and 1 chain stitch in between each set of double crochets. This will give your granny square its signature look.
To finish your granny square, join the last round with a slip stitch to the top of the chain 3 at the beginning of the round. Then, fasten off your yarn and weave in the ends to secure your work. With practice and patience, you’ll be able to crochet beautiful granny squares in no time!
Adding Personal Touches to Your Granny Squares
One way to make your granny squares truly special is by adding personal touches to each one. By incorporating unique elements, you can make your crochet project stand out and showcase your creativity. Here are some fun ideas to help you customize your granny squares:
Colorful Yarn: Experiment with different colors of yarn to create eye-catching granny squares. Mix and match hues to create a vibrant and colorful design.
Embroidery: Add delicate embroidery details to your granny squares for a beautiful and intricate look. You can stitch on flowers, geometric patterns, or your initials to give your squares a personalized touch.
Charms and Beads: Attach small charms or beads to your granny squares for a touch of whimsy and elegance. You can sew on beads in different shapes and colors to create a textured and unique design.
Key Takeaways
As you finish up your granny square crochet project, take a moment to appreciate the combination of creativity and craftsmanship that went into each stitch. Whether you’re a beginner or a seasoned crocheter, the beauty of a granny square lies in its simplicity and versatility. So, grab your yarn and hook, and let your imagination run wild as you create your own unique masterpiece. Remember, the possibilities are endless when it comes to crocheting, so don’t be afraid to experiment and have fun with your creations. Happy crocheting!